

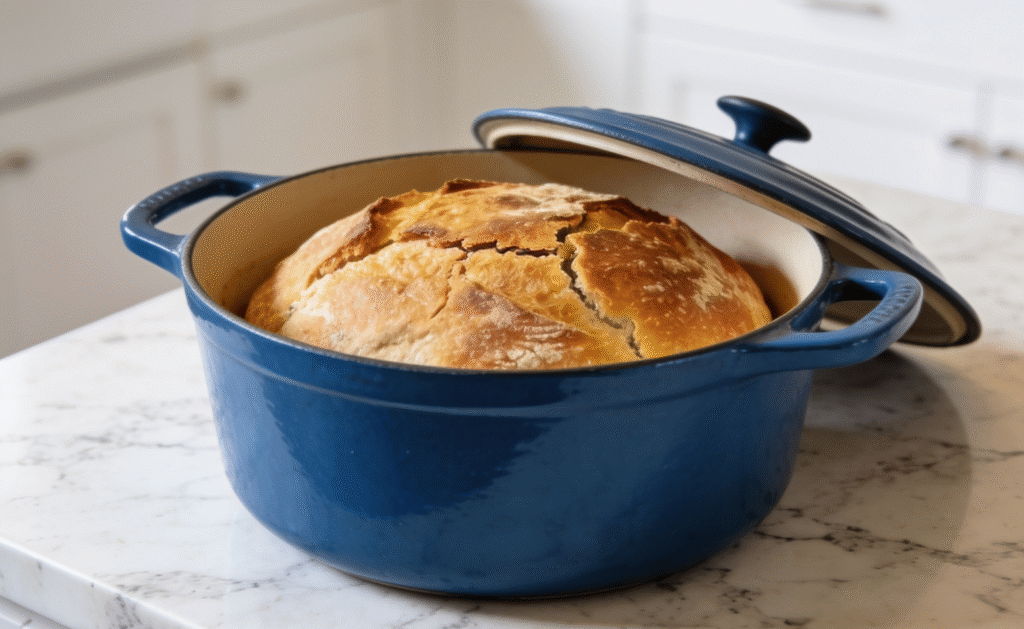
There is something magical about pulling a golden loaf of dutch oven bread from the oven. The crackling crust, soft interior, and irresistible aroma can make any home feel like a professional bakery. The best part? You don’t need years of baking experience to achieve outstanding results.
Whether you’re new to bread baking or looking to improve your technique, mastering dutch oven bread is one of the most rewarding skills a home cook can learn.
Why Dutch Oven Bread Has Become So Popular
Over the last decade, home bakers have embraced dutch oven bread because it produces exceptional results with minimal equipment. A Dutch oven traps steam during baking, creating the ideal environment for bread to rise and develop a crisp crust.
Professional bakeries often use steam-injected ovens. A Dutch oven mimics this process in a home kitchen, making artisan-style bread accessible to everyone.
For more professional cooking techniques, visit https://www.chefworx.ca.
What Is Dutch Oven Bread?
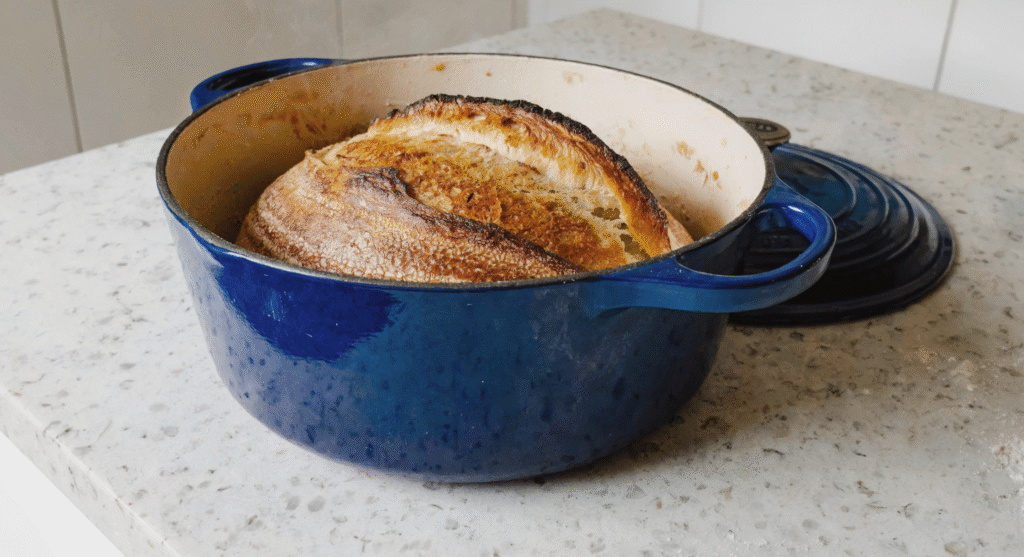
Dutch oven bread is bread baked inside a heavy, covered cast iron pot known as a Dutch oven. The enclosed environment creates moisture that helps the dough expand fully before the crust sets.
The result is:
- A crispy, golden crust
- A soft and airy crumb
- Excellent oven spring
- Rich flavor development
This method works especially well for no-knead bread recipes, making it ideal for beginners.
The Science Behind Dutch Oven Bread
Understanding the science can help improve your baking success.
When dough enters a hot Dutch oven, moisture from the dough turns into steam. Because the lid traps that steam, the bread remains flexible during the first phase of baking.
This allows the loaf to expand dramatically before the crust hardens.
Benefits include:
| Benefit | Result |
| Steam Retention | Better rise |
| Consistent Heat | Even baking |
| Heavy Construction | Superior crust |
| Enclosed Environment | Bakery-style results |
According to educational resources from the https://www.kingarthurbaking.com and https://www.seriouseats.com, steam plays a critical role in creating artisan bread characteristics.
Essential Ingredients
Flour Choices
Bread flour is generally the preferred option because of its higher protein content. The extra protein helps develop gluten, which creates structure and chewiness.
Good options include:
- Bread flour
- All-purpose flour
- Whole wheat flour blends
Yeast Selection
You can use:
- Instant yeast
- Active dry yeast
- Fresh yeast
Instant yeast is often the easiest option for beginners because it requires less preparation.
Water and Salt
Water activates the yeast and hydrates the flour. Salt strengthens gluten and enhances flavor.
Always use fresh ingredients for the best results.
Equipment You’ll Need
The beauty of dutch oven bread is its simplicity.
Essential equipment includes:
- Dutch oven
- Mixing bowl
- Measuring cups
- Kitchen scale
- Dough scraper
- Parchment paper
If you’re building a complete home baking setup, explore helpful kitchen resources at https://www.chefworx.ca.

7 Powerful Secrets for Success
Secret 1: Use High Hydration Dough
Many artisan bread recipes use doughs containing 70% or more water relative to flour.
Higher hydration creates:
- Larger air pockets
- Better texture
- Improved crust formation
Although sticky dough can feel intimidating, it often produces superior bread.
Secret 2: Preheat Thoroughly
Never rush preheating.
Place your Dutch oven inside the oven and allow it to heat for at least 30 to 45 minutes before baking.
A fully heated Dutch oven provides the intense initial heat needed for maximum oven spring.
Secret 3: Let Time Do the Work
Patience is one of the most important ingredients.
Long fermentation develops:
- Better flavor
- Improved texture
- Stronger gluten structure
Many bakers allow dough to ferment overnight for optimal results.
Secret 4: Score the Dough

Scoring means making shallow cuts in the dough before baking.
Benefits include:
- Controlled expansion
- Attractive appearance
- Better oven spring
A sharp razor blade or bread lame works best.
Secret 5: Create Steam
The Dutch oven naturally traps steam.
Keep the lid on during the first 20 to 30 minutes of baking. This allows the dough to expand before the crust hardens.
Removing the lid later encourages browning and crispness.
Secret 6: Monitor Temperature
Temperature matters at every stage.
Recommended baking temperatures:
| Stage | Temperature |
| Preheating | 450°F to 500°F |
| Covered Baking | 450°F |
| Uncovered Baking | 425°F to 450°F |
An instant-read thermometer can help ensure accuracy.
Secret 7: Cool Properly
Many bakers make the mistake of cutting into bread immediately.
Allow your loaf to cool for at least one hour.
Cooling helps:
- Finish the baking process
- Improve texture
- Prevent gumminess
Patience pays off.
Common Mistakes to Avoid
Even experienced bakers occasionally encounter problems.
Here are some common mistakes:
Underproofing
Underproofed dough lacks sufficient fermentation time and may produce dense bread.
Overproofing
Too much fermentation weakens dough structure and reduces oven spring.
Insufficient Preheating
A cool Dutch oven limits expansion and affects crust development.
Excess Flour
Adding too much flour can make bread dry and dense.
Skipping Cooling Time
Cutting into hot bread often results in a gummy interior.
Avoiding these mistakes can dramatically improve your results.
Variations to Try
Once you’ve mastered basic dutch oven bread, experiment with different flavors.
Popular additions include:
Herb Bread
Mix in:
- Rosemary
- Thyme
- Oregano
Cheese Bread
Add:
- Parmesan
- Cheddar
- Gruyère
Seeded Bread
Try:
- Sesame seeds
- Pumpkin seeds
- Sunflower seeds
Whole Wheat Bread
Substitute part of the white flour with whole wheat flour for added nutrition and flavor.
Serving Suggestions
Fresh dutch oven bread pairs beautifully with many dishes.
Serve it with:
- Soups
- Stews
- Pasta dishes
- Cheese boards
- Sandwiches
It also makes excellent toast the next day.
For pairing inspiration and culinary tips, visit https://www.bonappetit.com.
Frequently Asked Questions
1. Why is my dutch oven bread dense?
Dense bread is often caused by underproofing, insufficient hydration, or inadequate gluten development.
2. Can I make dutch oven bread without a Dutch oven?
Yes, but results may vary. Baking stones and steam trays can help replicate the effect.
3. What size Dutch oven is best?
A 5- to 7-quart Dutch oven works well for most recipes.
4. Can I refrigerate the dough overnight?
Absolutely. Cold fermentation often improves flavor and texture.
5. Why didn’t my bread rise?
Possible causes include inactive yeast, underproofing, or poor dough handling.
6. How do I store dutch oven bread?
Store it in a paper bag or bread box at room temperature for up to three days.
7. Can I freeze dutch oven bread?
Yes. Wrap it tightly and freeze for up to three months.
Conclusion
Learning to bake dutch oven bread is one of the most satisfying kitchen skills you can develop. With simple ingredients, a little patience, and the right technique, you can create bakery-quality loaves at home.
By following these seven powerful secrets, you’ll consistently achieve better texture, superior crusts, and richer flavor. Whether you enjoy classic artisan loaves or creative variations packed with herbs and cheese, dutch oven bread offers endless possibilities for home bakers.
Start with the basics, trust the process, and enjoy every slice.