

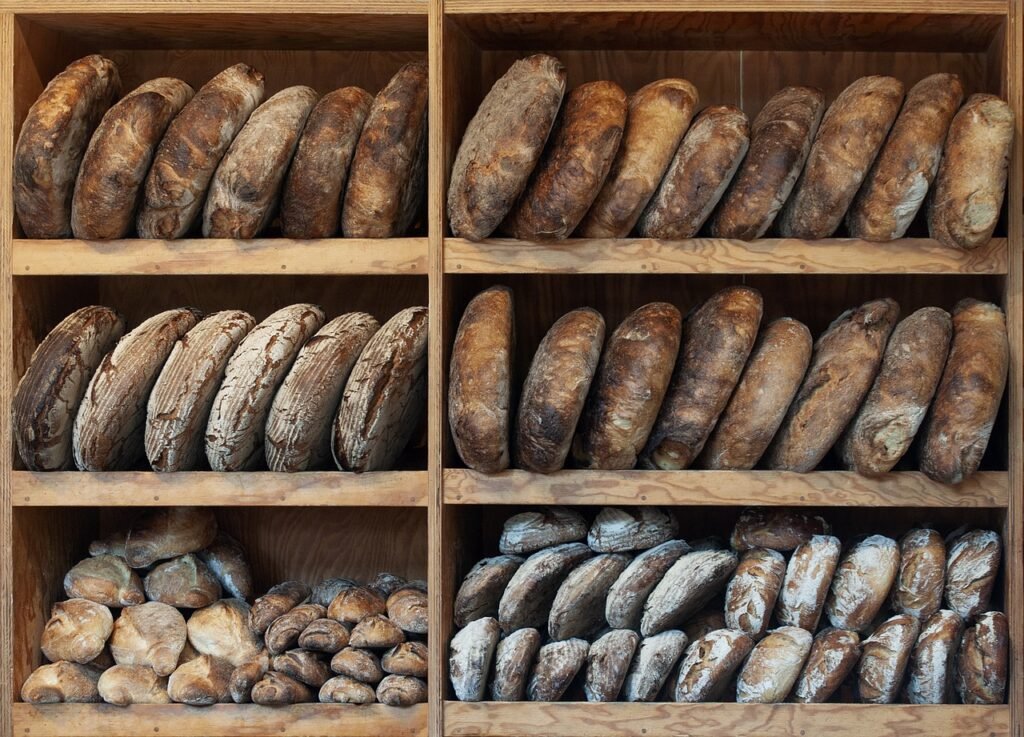
Welcome to “The Art of Sourdough: Beginner’s Guide to Natural Leavening.” Sourdough bread has been enjoyed for centuries, not only for its delicious flavor but also for its unique texture and health benefits.
If you’ve ever been captivated by the tangy aroma and complex taste of sourdough, you’re in the right place. In this comprehensive guide, we’ll take you on a journey to discover the art of sourdough baking from scratch.
Whether you are a complete novice or have dabbled in bread making, this article will provide you with the essential knowledge, techniques, and tips to create your own sourdough bread using natural leavening. Get ready to unlock the secrets of sourdough and embark on a delicious and fulfilling baking adventure.
1. Understanding Sourdough: An Introduction to Natural Leavening
The History and Origins of Sourdough
Sourdough has a long and fascinating history that dates back thousands of years. It is believed to have originated in ancient Egypt and was later adopted by civilizations like the Greeks and the Romans. Sourdough has stood the test of time because of its unique ability to leaven bread without the need for commercial yeast. So, when you bake with sourdough, you’re tapping into a centuries-old tradition that has been passed down through generations.

The Benefits of Baking with Natural Leavening
Baking with natural leavening, or sourdough, offers a variety of benefits that make it a favorite among bread enthusiasts. Firstly, sourdough bread has a distinct and complex flavor profile that is hard to replicate with commercial yeast. It has a tangy, slightly acidic taste that adds depth to your baked goods. Secondly, sourdough bread tends to have a longer shelf life compared to bread made with commercial yeast, thanks to the natural preservatives produced during the fermentation process. Lastly, sourdough bread is generally easier for our bodies to digest, making it a great option for those with gluten sensitivities.
2. Getting Started: Essential Tools and Ingredients for Sourdough
Selecting the Right Flour for Sourdough
Choosing the right flour is essential for successful sourdough baking. Generally, you’ll want to use a high-quality bread flour or all-purpose flour with a protein content of around 11-13%. Avoid using cake flour or low-protein flours, as they don’t provide the necessary gluten development for a good rise.
Other Key Ingredients for Sourdough
Aside from flour, there are a few other key ingredients you’ll need for sourdough baking. Salt is crucial not only for flavor but also for controlling the fermentation process. Water is vital for hydrating your dough and activating the natural yeasts. Some recipes may also call for additional ingredients like honey or olive oil to enhance the flavor or texture.
Essential Tools and Equipment for Sourdough Baking
To get started with sourdough baking, you’ll need a few basic tools and equipment. A kitchen scale will help you measure your ingredients accurately, as sourdough baking is all about precision. A large mixing bowl, a mixing spoon or dough scraper, and a Dutch oven or baking stone are also essential for shaping and baking your bread. And of course, don’t forget a good old-fashioned oven to work its magic!
3. Creating a Sourdough Starter: Step-by-Step Guide
Understanding the Role of Wild Yeasts
Wild yeasts are the magical microorganisms responsible for the fermentation process in sourdough. They are naturally present in the air, on the surface of grains, and even on your hands. These yeasts, along with lactic acid bacteria, form a symbiotic relationship that gives sourdough its unique flavor and texture.

Preparing the Initial Starter Mixture
Creating a sourdough starter is like cultivating a mini ecosystem in your kitchen. It starts by mixing flour and water to create a simple mixture that attracts wild yeasts. Over the course of a few days, you’ll feed this mixture regularly, allowing the yeast to multiply and ferment. Gradually, your starter will become active and ready to use for baking.
Feeding and Maintaining Your Sourdough Starter
Once you have an active sourdough starter, you’ll need to take care of it to keep it healthy and ready for baking. Regular feeding with fresh flour and water is key to maintaining a strong and active starter. You’ll also need to discard a portion of your starter regularly to prevent it from becoming too large and difficult to manage. With proper care, your sourdough starter can become a cherished kitchen companion.
4. The Science Behind Sourdough: Fermentation and Its Benefits
The Fermentation Process in Sourdough Baking
Fermentation is at the heart of sourdough baking. Once you mix your starter with flour and water, the wild yeasts and lactic acid bacteria become active. These microorganisms consume the sugars in the flour, producing carbon dioxide gas and organic acids. The carbon dioxide gas is what causes the dough to rise, creating those beautiful air pockets in your bread. The organic acids contribute to the distinctive tangy flavor of sourdough.
Health Benefits of Fermented Foods
Fermented foods, like sourdough bread, offer numerous health benefits. The fermentation process promotes the growth of beneficial bacteria, which can support a healthy gut microbiome. These bacteria aid in digestion, improve nutrient absorption, and strengthen the immune system. Additionally, the fermentation process can break down some of the components in grains that may be harder for our bodies to digest, making sourdough a more easily tolerable option for some individuals.
So, there you have it – a beginner’s guide to the art of sourdough! Armed with this knowledge, you’re ready to embark on your sourdough journey and become a master of natural leavening. Remember, it’s all about patience, practice, and of course, enjoying the delicious results of your efforts. Happy baking!
5. Mastering Sourdough Techniques: Mixing, Folding, and Shaping the Dough
Understanding the Autolyse Method
When it comes to making sourdough bread, understanding the autolyse method is key. It may sound like some fancy term from a science fiction novel, but it’s actually a simple technique that involves mixing flour and water and letting them rest before adding the sourdough starter. This allows the flour to hydrate fully, resulting in a dough that’s easier to work with and yields a better texture in the final bread.
Proper Mixing Techniques for Sourdough Dough
Mixing the dough is where the magic happens. You want to make sure all the ingredients are evenly distributed without overdoing it and developing too much gluten. One technique is to mix the dough using the “pinch and fold” method. Just pinch the dough and fold it over itself, repeating the process until everything is well incorporated. It’s like giving your dough a little love tap to make sure everything is mixed in.
Folding and Stretching Techniques to Develop Gluten
To develop that lovely structure and elasticity in your sourdough bread, you’ll need to incorporate some folding and stretching techniques. Every so often during the bulk fermentation process, gently stretch the dough and fold it over itself. This helps build up the gluten and creates those beautiful air pockets that give sourdough its characteristic texture.
Shaping the Dough for Different Styles of Sourdough Bread
Shaping your sourdough dough is where you can let your creative side shine. Whether you prefer a traditional round loaf or want to experiment with different shapes, the key is to handle the dough gently to preserve those precious air bubbles. With a little practice, you’ll be shaping your dough into intricate designs that will impress even the toughest sourdough critics.
6. Baking Perfect Sourdough: Tips and Tricks for Achieving the Best Results
Preheating the Oven and Using the Right Bakeware
Before you embark on your sourdough baking journey, make sure your oven is properly preheated to the right temperature. This ensures that your bread gets that perfect rise and develops a delightful crust. Additionally, choosing the right bakeware, such as a cast iron Dutch oven or a baking stone, can help create an ideal baking environment for your sourdough loaves.
Creating Steam for Optimal Crust Development
Steam is the secret ingredient to achieving a bakery-quality crust on your sourdough bread. By adding steam to the oven during the initial stages of baking, you create a moist environment that allows the crust to develop evenly, resulting in that coveted crackly exterior. Simple techniques like placing a tray of hot water in the oven or spraying the dough with water before baking can do wonders for your crust.
Understanding Baking Times and Temperatures
Baking times and temperatures can vary depending on your sourdough recipe and desired outcome. Generally, sourdough bread benefits from a longer, slower bake at a slightly lower temperature. This helps ensure that the bread is fully cooked on the inside while achieving that beautiful golden crust. It may take a few tries to find the perfect balance for your oven, but remember, practice makes perfect (and delicious) sourdough!
7. Troubleshooting Common Sourdough Issues: Solutions and Fixes

Dealing with Overproofed or Underproofed Dough
Sometimes, despite your best efforts, you may end up with overproofed or underproofed dough. Overproofed dough can lead to a flat, collapsed loaf, while underproofed dough may result in a dense and tight crumb. The key is to pay attention to the dough during the fermentation process, looking for signs of proper rise and a slightly domed shape. Adjusting the proofing time or temperature can help you achieve the perfect balance.
Addressing a Dense or Gummy Crumb
If your sourdough bread turns out dense or gummy on the inside, don’t despair. This can happen due to various factors, such as underdeveloped gluten or improper oven temperature. To address this issue, make sure your dough goes through sufficient mixing, folding, and shaping to develop the gluten properly. Additionally, double-check your oven temperature to ensure that your bread bakes all the way through.
Preventing Common Sourdough Bread Fails
Even the best sourdough bakers have their fair share of failures. But fear not, for every failed loaf is an opportunity to learn and improve. To prevent common sourdough bread fails, pay attention to the details: accurate measurements, consistent feeding of your sourdough starter, and proper temperature control during fermentation and baking. And remember, it’s just bread, not a life-and-death situation. Embrace the imperfections and have fun along the way!
8. Exploring Sourdough Variations: Flavors, Additions, and Artistic Leavening
Adding Herbs, Spices, and Other Flavors to Your Sourdough
Once you’ve mastered the basic sourdough techniques, it’s time to get creative with flavors. Adding herbs, spices, or even cheese to your dough can take your sourdough bread to a whole new level. Experiment with different combinations and quantities to find your signature flavor.
Exploring Artistic Loaf Designs and Decorations
Sourdough bread not only satisfies your taste buds but can also be a feast for the eyes. With a little extra effort, you can create stunning artistic designs on your loaves. Score the dough in intricate patterns or use stencils to add decorative flourishes. The possibilities are endless, and your sourdough bread will become a work of art that will impress both friends and Instagram followers alike.
With these tips and tricks, you’re well on your way to becoming a sourdough connoisseur. So grab your apron, embrace the tangy aroma of fermentation, and let your sourdough journey begin! Happy baking!
As you conclude your journey through “The Art of Sourdough: Beginner’s Guide to Natural Leavening,” we hope you feel empowered and inspired to embark on your sourdough baking adventures. Remember, sourdough is not just a bread, but a testament to the time-honored tradition of natural leavening. With patience, practice, and a love for the process, you can create your own unique sourdough creations, each with its own flavor and character. So, roll up your sleeves, gather your ingredients, and let the magic of sourdough guide you in the kitchen. Happy baking!

FAQ
1. Can I use all-purpose flour for making sourdough?
Yes, you can use all-purpose flour for making sourdough. However, using a combination of all-purpose flour and whole wheat or rye flour can enhance the flavor and texture of your sourdough bread.
2. How long does it take to create a sourdough starter?
Creating a sourdough starter can take anywhere from 5 to 7 days. The fermentation process requires time for the wild yeasts to colonize and for the starter to become active and ready for baking.
3. Why is my sourdough bread not rising?
There are several reasons why your sourdough bread may not be rising properly. It could be due to an underfed or weak starter, insufficient fermentation time, or a lack of gluten development. Troubleshooting common issues can help identify the problem and find a solution.
4. Can I add different ingredients to my sourdough bread?
Absolutely! Sourdough bread offers endless opportunities for creativity. You can experiment with various additions like herbs, spices, nuts, seeds, dried fruits, or even cheese to add unique flavors and textures to your loaves.
